Happy Monday, creative family, and welcome to Logiaweb Weekly.
This week’s design intelligence briefing reveals:
🧪 What I'm Building: Behind the Scenes
🤖 Design Inspiration: Face enhancement
🛠️ Tutorial of the Week: Premium website in under 10 minutes with Figma + AI
💡 Prompt of the Week: Habit tracker using Notions AI
⚙️ Tool of the Week: The #1 AI Creative Engine for High-Performing Marketing

WHAT I’M BUILDING
Behind the Scenes
This week was about getting back into the rhythm - back to the grind, except for the 31st, which I spent with friends to properly close the year.
Three months ago, I set myself a challenge: start a new design studio and hit 50k in a single month, with only three months to make it happen. The first two months didn’t get us there. This third one? We’re very close. A few big potential clients are still in discussion, and next week will decide everything. I’ll share a full breakdown of the challenge once it’s done.
What’s funny is how fast things change. Before YouTube banned me (still no clear reason), my days were filled with content creation: scripting, filming, preparing assets. Now, most of my time goes into the studio: sales calls, client work, and thinking about growth.
Different season. Same ambition.

BIG NEWS
Adobe just made a move most people will sleep on, but shouldn't.
Photoshop's Generative Fill now supports third-party AI models. You can choose which AI does the work.
That's it. Sounds small. But if you've been bouncing between tools just to get one edit right, you already know why this matters.

What caught my attention:
You're not stuck with one AI anymore. Need clean text in an image? Swap models. Need photorealistic product shots? Use a different one. Need brand safe edits? Back to Firefly
Before this, your workflow probably looked like this: generate in Midjourney→, export→, clean up in Photoshop→ regenerate when it breaks→ repeat until you hate yourself.
Now? Stay in one canvas. Pick the model that's actually good at what you need. Done.

Why it matters
Different models are just better at different things. We've all known this. But the tools never let us act on it.
Firefly is safe and consistent. Great for client work where you can't risk copyright chaos.
But other models crush it when you need readable UI text, precise layout control, or product realism.
This solves the "why does my AI output look 90% right but never professional" problem. And the answer isn't "prompt better." It's "use the right tool for the job."
For experienced designers, this is a speed unlock. Fewer exports. Fewer do overs. Faster revisions. More control without leaving Photoshop.

The real win
Most designers are still treating AI like a lottery. Roll the dice, hope it works, fix it manually when it doesn't.
Photoshop flips that. Now you're a strategist, not a gambler.
Think about where your workflow breaks. Text? Lighting? Layout precision? Now you can route those tasks to the model that actually handles them well.
This isn't about knowing every AI model. It's about knowing which one solves your current problem fastest.
Designers who figure this out early will quietly lap everyone still stuck in the loop of regenerating 50 times.
Photoshop isn't just an editor anymore. It's becoming mission control for AI design. And if you're not experimenting with this now, you're giving competitors a head start.
DESIGN INSPIRATION
Face enhancement
Tool Used: Leonardo AI

PROMPT: Close-up professional portrait of a person with a refined, even complexion and a smooth, perfected skin finish that appears clean, healthy, and natural. Soft, diffused studio lighting creates gentle highlights and subtle shadows, enhancing facial structure without harsh contrast. Facial features are sharp, well-balanced, and realistic, with a calm, confident expression and accurate proportions. The background is neutral and unobtrusive, keeping full focus on the face. The overall image is photorealistic, ultra-clean, and polished, with a professional studio look. The presentation is flawless and consistent, with no visible imperfections, heavy skin texture, distortion, blur, noise, oversharpening, or stylized illustration effects.Tool Used: Playground AI

PROMPT: Ultra-realistic photographic close-up portrait of a real human subject, captured as if with a professional DSLR camera. Skin is completely clear and even, free from acne, blemishes, redness, scars, or discoloration, while still looking naturally human and believable. The skin surface is smooth and refined with subtle tonal variation and realistic light interaction, not glossy, plastic, or artificial.

Soft, diffused studio lighting evenly illuminates the face with gentle highlights and natural shadow transitions. Facial features are anatomically accurate, well-proportioned, and distinctly human, with a calm, neutral expression. Neutral background, shallow depth of field, sharp focus on the eyes.

Photorealistic, camera-captured look with high resolution and clean detail. No CGI, no 3D render appearance, no doll-like skin, no exaggerated symmetry, no illustration or stylized beauty aesthetic.Tool Used: Grok

PROMPT: Cinematic close-up portrait of a person with flawless, perfectly smooth poreless skin, no acne, no blemishes, no redness, luxury beauty finish, soft diffused studio lighting, natural head movement and blinking, sharp facial features, realistic proportions, high-end cosmetics advertising style, consistent skin across all frames, no flicker or face warping, ultra high resolution.TUTORIAL OF THE WEEK
Premium website in under 10 minutes with Figma + AI
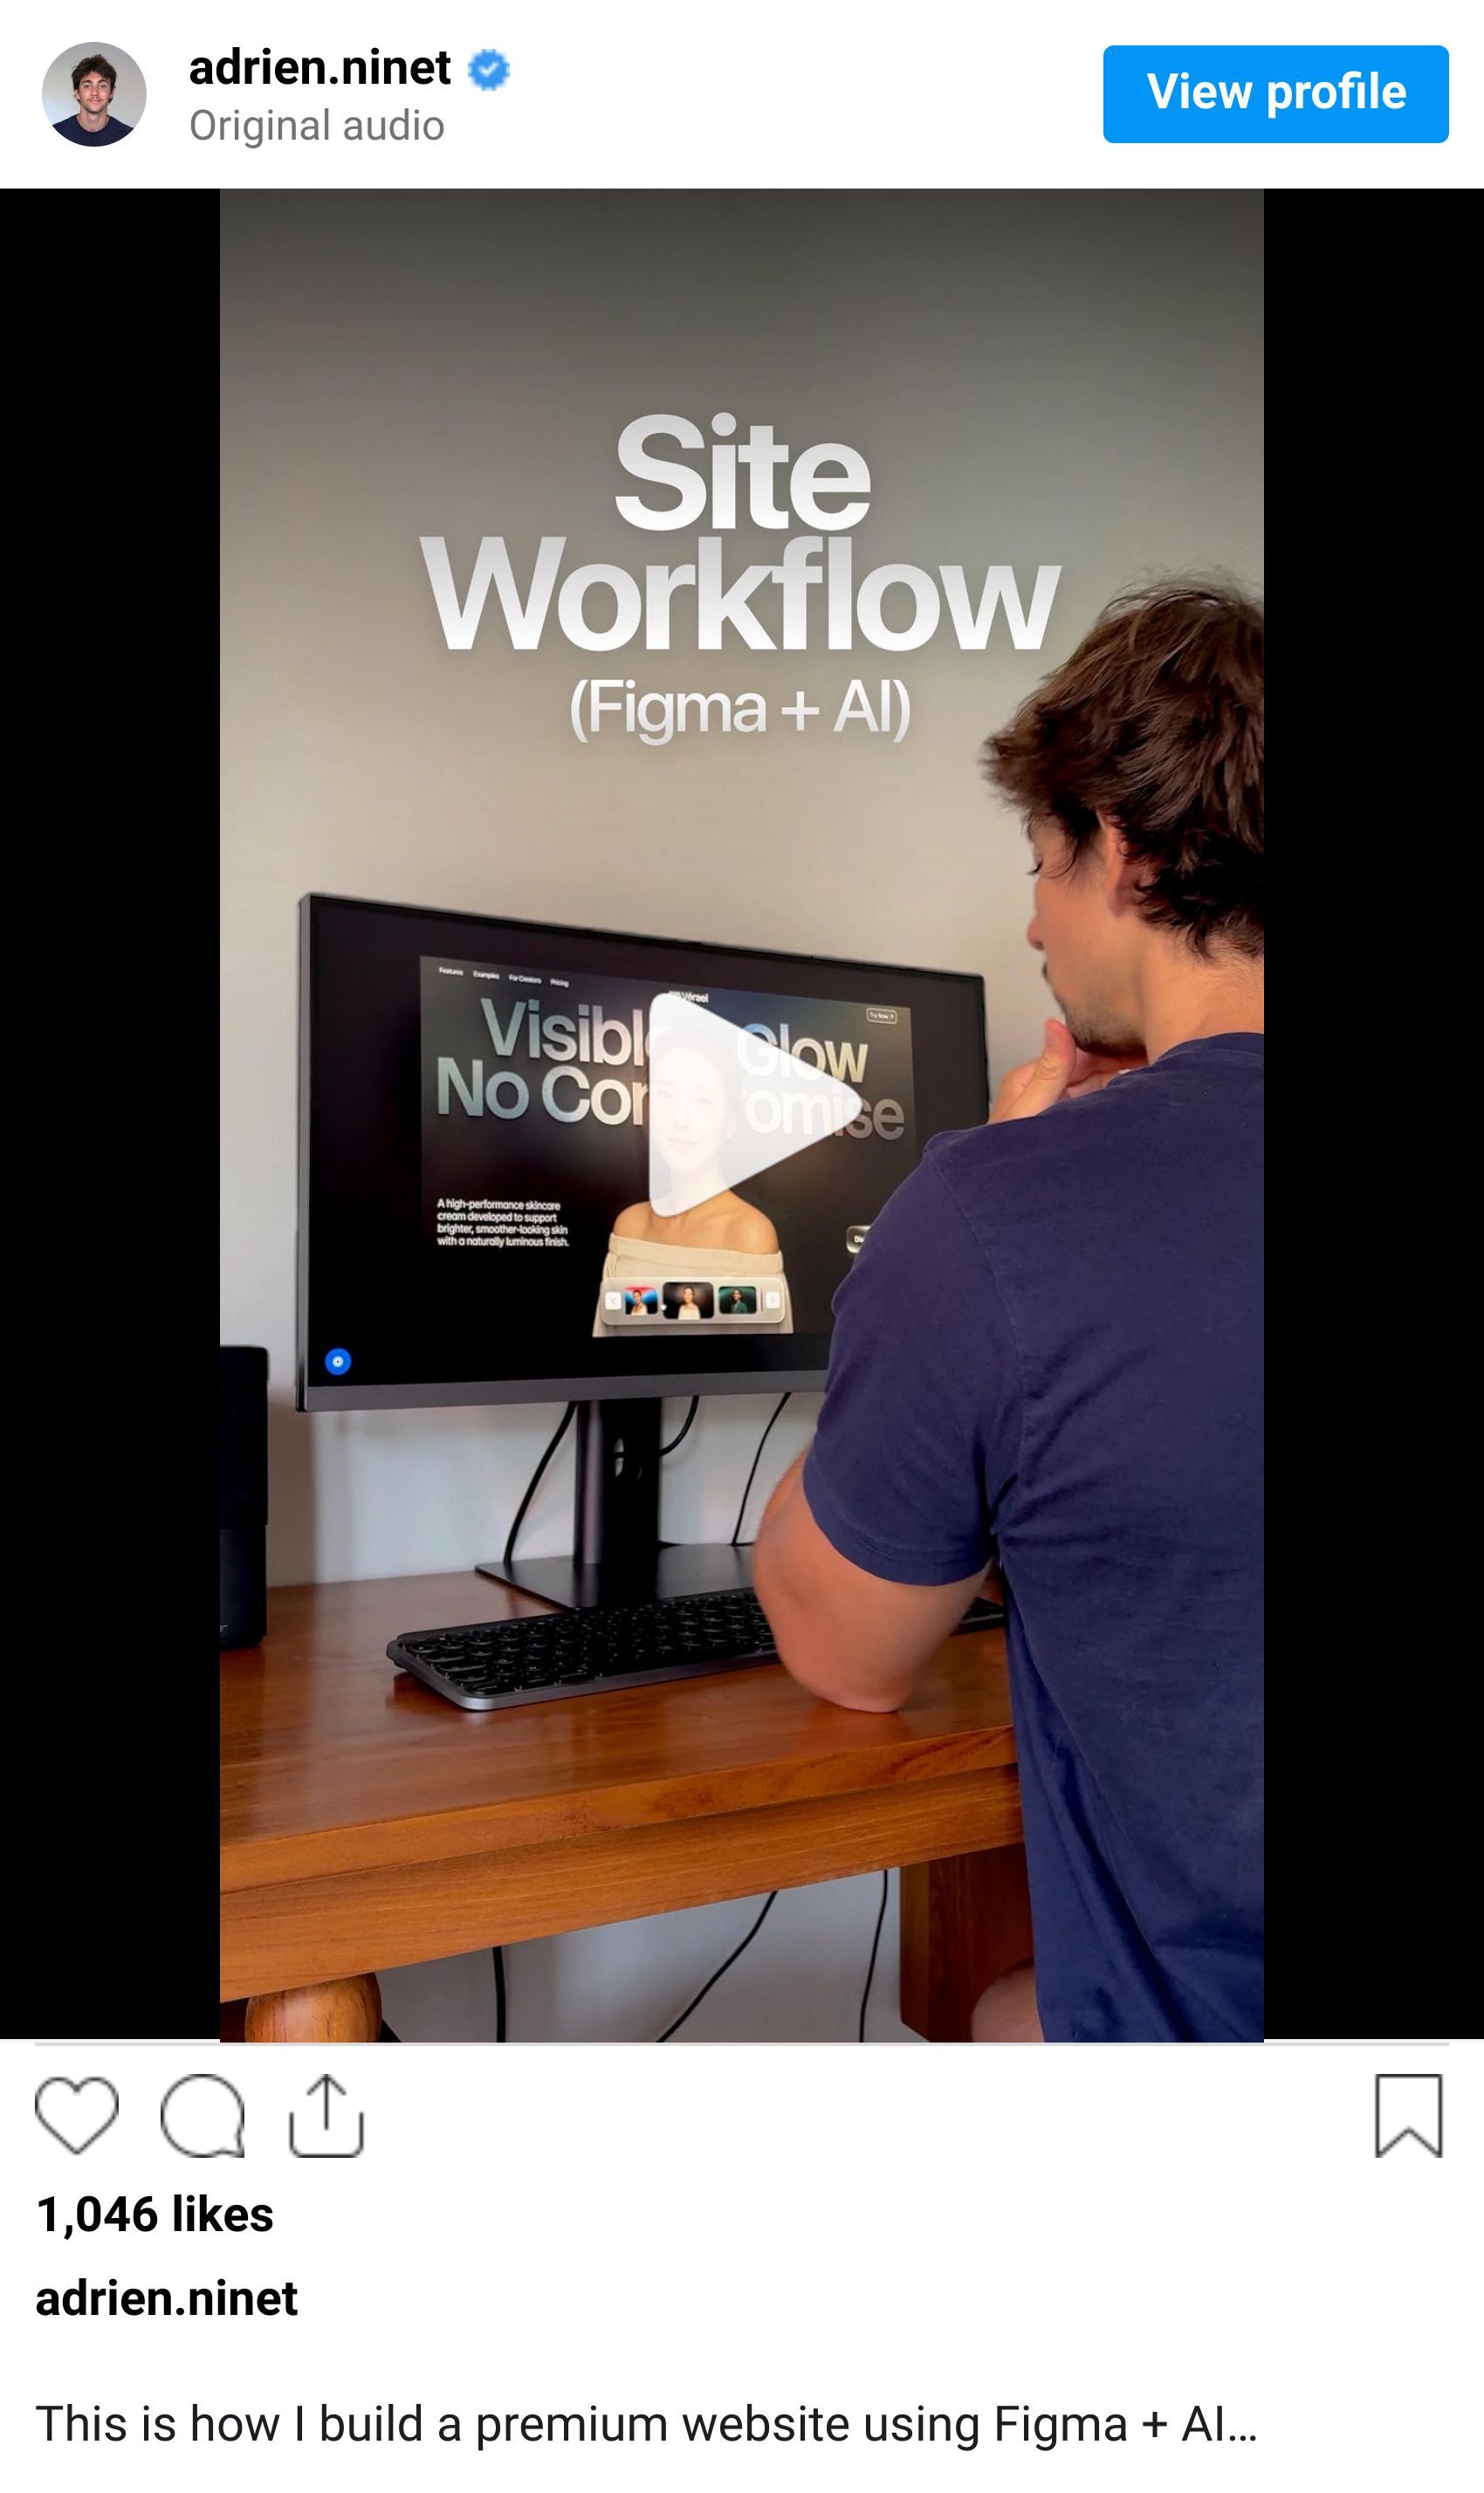
No more spending hours brainstorming ad concepts from scratch. This workflow steals what's already working and adapts it to your products in minutes.
Most designers waste hours generating assets, writing copy, and tweaking layouts separately. This workflow chains everything together so you go from blank canvas to polished prototype without the usual back and forth chaos.
Step 1: Set Your Foundation in Figma
Open Figma and create a new file.
Explore your UI structure. Test color palettes, spacing, and layout direction before you commit.
Keep it simple. Navbar, hero section, headline placeholder. Build the base first.
Pro Tip: Don't overcomplicate this stage. You're setting up the canvas, not designing the end product.

Step 2: Generate Your Model Images
Head to Higgsfield and select Nano Banana Pro.
Generate your first model image. Describe the vibe, pose, and aesthetic you're going for.
Use the skin enhancer tool to push realism. The difference is honestly ridiculous. What looks decent becomes magazine quality in one click.

TIP: Look for ads with strong visuals, clear hooks, and simple layouts. Those are the ones that convert.
Step 3: Write Your Copy with ChatGPT

Step 4: Design Your Hero Section
Back in Figma, place your generated model front and center in the hero.
Add your headline, custom buttons, and a clean background that doesn't compete with the visual.
Build a custom slider component for interaction. This makes the prototype feel real, not static.
Pro Tip: Don't crowd the hero with too many elements.

Step 5: Create Variations and Animate
Generate 2 to 3 more model variations in Higgsfield using the same settings.
Duplicate your hero section in Figma and swap in the new models.
Use Figma’s prototype mode to animate transitions between sections. Smooth fades, subtle interactions. Nothing over the top.

Step 6: Test and Refine
Present mode in Figma lets you click through the prototype like a real site. Navigate, test your slider, check transitions. If something feels off, fix it at this stage.
What used to take half a day now happens in one focused session. You stay in flow with minimal tool switching.
If you're juggling too many apps just to build one mockup, this is your new baseline.
Try Figma here & Higgsfield here.
PROMPT OF THE WEEK

PROMPT: Create a brand new Notion page called Habit Tracker with a two-column layout of similar width; in the left column, add a gray background callout with a checkmark icon and the bold title Add a Habit, followed by five clearly separated, label-style sections (not buttons) that are easy to scan and visually minimal, using consistent color coding across the page: Health (green), Mindset (brown), Self-Care (pink), Fitness (blue), Productivity (yellow), styled as small pills or subtle colored callout lines; beneath that, add a second gray background callout with an info icon and the heading Guide to this Template, then include these bullets exactly: “Add a new habit using the table on the right”, “Assign a habit type to group habits automatically”, “Check off days to track consistency”, “Use the date field to track habits by day or week”; in the right column, create an inline table database named Habit Tracker with these properties exactly: Habit Name (title), Habit Type (select) with options and colors exactly as Health (green), Mindset (brown), Self-Care (pink), Fitness (blue), Productivity (yellow), Day 1 (checkbox), Day 2 (checkbox), Day 3 (checkbox), Day 4 (checkbox), Day 5 (checkbox), Date (user input) (date, not datetime), and Date (formula) that mirrors the value of “Date (user input)”; configure the default table view to group by Habit Type with empty groups hidden and display columns in this exact order: Habit Name, Habit Type, Day 1, Day 2, Day 3, Day 4, Day 5, Date, Date (user input), while keeping spacing and layout consistent with the reference image—callouts on the left, database on the right, a clean dark-mode-friendly aesthetic, subtle dividers, and a checklist-style daily tracking grid.TOOL OF THE WEEK
Tool Name: Genus AI
Most AI creative tools just spit out generic assets and call it a day. Genus AI actually understands how brands grow and turns your product data into high-performance marketing creative.
Here’s what makes it different: it automatically generates on brand product images, videos, and copy at scale, models ideal audiences, and provides actionable insights to improve ad performance all without manual design or endless A/B testing.
No static catalogs, no generic creative dumps. Everything is tagged, optimized, and ready to deploy across social and ad platforms so your campaigns finally deliver results after they launch.
👉 Here’s the 30 second demo that blew my mind.
🧠 How I'd use it
I’d treat Genus AI like a creative growth engine for marketing teams. Instead of manually designing ads, guessing audiences, or endlessly tweaking creatives, I’d let Genus ingest our product data once and continuously generate high performing visuals, videos, and copy tailored to the right audiences.
Rather than juggling designers, spreadsheets, and ad dashboards, I’d use it to auto produce on brand creative at scale, test what works, and surface insights on why it works so every campaign gets smarter over time. No creative bottlenecks, no guesswork, no waiting weeks to iterate.
It’s perfect for brands launching new products, growth teams scaling paid ads, founders without in house design, and marketers tired of burning budget on creative that doesn’t convert.
This is the missing layer between product data and profitable marketing execution.
That’s it for this week, but I want to make each edition even better.
👉 Got 30 seconds?
Fill out this quick survey and tell me what you'd love to see next. Your feedback directly shapes the next drop.
💌 Know a designer who should be using AI smarter?
Forward them this email. Or just send them to logiaweb.com/weekly to join.
See you next Monday,
— Adrien


Adrien Ninet
